BACK

1) For the front and straps, I cut the Front (main and lining fabric) as directed as well as the Front Contrast , 2 Strap pieces and ruffles for the straps. Note: I don't use the Front Contrast Lining. Also, I'm so used to using 1/2" seam allowance so I add extra to all pieces since the pattern specifies there is a 1/4" seam allowance. The seams will get trimmed later either with scissors or the serger.
2) For the back, I fold the fabric and place the Back pattern piece 3-4" from the fold. I know this changes the orientation of the grainline from what the pattern indicates but it works fine. The extra width of the back allows the top to be pulled over the girl's head but doesn't make it too full in back. Cut Back Constrast so it is the same width as the Back all one piece. Note: I don't use the Back Lining or the Back Contrast Lining.

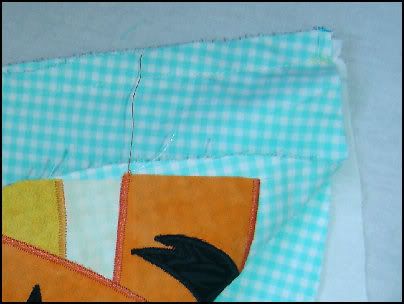
3) Baste stitch 1/4" from lower edge of Front Contrast. Clip seam allowance at the curves just to stitch line. Turn up edge using stitching as guide and press in place.

4) Place Front Contrast along top edge of Top.

5) Baste stitch Front Contrast along top edge of Top (I baste so it's about 3/8" from the edge so it will be hidden by later stitching. Topstitch 1/8" from lower edge of Front Contrast.

6) Position straps as shown in pattern instructions. Pin in place. Note: I like to angle the straps slightly so they lay flat when worn.

7) Stitch Front Lining to Front along top edge. Trim seam allowance clipping at the curves as needed so when it's turned RIGHT SIDE out the curves will lay flat.

8) Turn Front right side out and press along top edge.

9) Turn one long edge of Back Contrast up 1/4" and press. Pin free ends of Straps in place with the WRONG SIDE of the Straps to the WRONG SIDE of the Back. (This will make sense later. :-) Place RIGHT SIDE of Back Contrast along top edge of WRONG SIDE of Back. Stitch along the top edge of Back. Trim the seam.

10) Turn Back Contrast to RIGHT SIDE of the Back. Press in place with folded edge of Back Contrast turned under. Topstitch 1/8" from lower edge of Back Contrast. Decide how many rows of elastic you want to have in the back and stitch the length of Back Contrast to create the casings. Note: I used two lengths of elastic in my sample so I on the Back Contrast to make the casing. The top of the Back Contrast was left to ruffle a little once the elastic was inserted.

11) Cut elastic 1/2 the chest measurement minus 1". Insert it into the casing and pin each end to secure. Note: You might need to adjust the length of the elastic but this gives you a good starting point.

12) Turn the Front inside out so the RIGHT SIDES of the main and lining fabrics are facing each other. Layer the Back between the Front main and lining pieces at the side seams. Basically, you're creating a fabric 'sandwich' with the 2 layers of the Front as the bread and the back as the filling. Stitch side seams and trim or finish as desired. Note: Now is a good time check the fit at the chest and adjust the elastic if needed.

13) Turn Front RIGHT SIDE out. Press side seams.

14) Topstitch 1/8" from top edge of Front Contrast.

15) Add the ruffle (or ruffles) along the unfinshed edge of the top. Finish the seam as desired and topstitch 1/4" from edge.


Thank you sooooooo much!!! I love this version!
ReplyDelete