Saturday, December 11, 2010

Half year anniversary giveaway


Just for fun, I'm going to do an impromptu giveaway to celebrate 6 months for my Etsy shop. The prize will be the winner's choice of fairy wings or superhero cape. Post below to enter and be sure I can find you based on your post here. :) This giveaway is open to all members of my Facebook fan page. Entry is open until 10pm PST on Sunday, 12/12.

Thursday, December 2, 2010

December Giveaway - Doll #2


The second doll is this sweet little mermaid, Mariana. She's about 6" from the top of her head to the tip of her tail. For a chance to win Mariana, you must be a fan on my Facebook page and post a comment below. Be sure to identify yourself in some way so I can contact you at the end of the contest. I'll close this to entries on Sunday, 12/5, at 8pm Pacific.

Note: If the same name is selected as the winner for both dolls, that person can select which doll to receive. Another name will be chosen to win the doll not selected.

December Giveaway - Doll #1


I'm doing another doll giveaway - this time I'll giveaway 2 dolls. The first is this cute toothfairy, Opal. She's an 8" friend and dressed in a beautiful lavender and white costume complete with a small tooth shaped bag to hold her nightly collections. For a chance to win Opal, you must be a fan on my Facebook page and post a comment below. Be sure to identify yourself in some way so I can contact you at the end of the contest. I'll close this to entries on Sunday, 12/5, at 8pm Pacific.

Note: If the same name is selected as the winner for both dolls, that person can select which doll to receive. Another name will be chosen to win the doll not selected.

Tuesday, October 26, 2010

Snicklefritz Friends Doll Giveaway

As a fun way to celebrate October birthdays for my daughter and me, I'm doing a doll giveaway. I've made 2 dolls so the winner can select a boy or girl, Hollis and Ivy. The other will be available for purchase after the giveaway is finished. For a chance to win one of these cute little holiday elves, you must be a fan on my Facebook page and post a comment below. Be sure to identify yourself in some way so I can contact you at the end of the contest. I'll close this to entries on Friday, 10/29, at 8pm Pacific.

Edited to add: If the winner of the giveaway would like to purchase the second doll, I'd be happy to work with her/him. Although I'd love these two to be able to stay together, I totally understand if that's not realistic for the winner... just as I'm not able to give both away. :)

Tuesday, June 1, 2010

She's a doll!


I finished the Waldorf-style doll this evening at the request of my daughter. She has been so interested in the process and had already claimed the doll before I was done. I kept the hair from the second head attempt but made a new head that I like much better. Initially I was going to make the doll a mermaid but then decided to make her with legs and have a tail that could be worn like a skirt. My daughter loved that idea and has since requested I make wings, too, so the doll can be a fairy sometimes. We still don't have a name for this sweet little urchin but I'm sure one will be found to fit soon.

Monday, May 31, 2010

A little playtime

Since I sew for a 'living', it's not really a hobby anymore. I still like to do other crafts from time to time but don't usually have much time for it. Recently, though, a couple friends jokingly challenged me to try making a Waldorf inspired doll (there was an ulterior motive to their challenge but that's OK LOL). I hadn't done much looking at soft dolls since my daughter hasn't shown much interest in dolls in general. However, I thought it might be fun to see what I could do with what I had on hand.

First I looked online at tutorials and websites, like Bamboletta, for dolls like I had in mind. I realized that I wouldn't be able to stay totally true to the ideals of this style in that I'd be using polyester batting for the stuffing (wool is the preferred choice for these dolls) and my selection of knit and yarn colors tended toward the bright rather than skin tones but I was excited by the idea of trying. My first head was OK but not what I had hoped to achieve. The facial features were small and the 'hair' shed a lot of fluff with the slightest movement. Still, I thought it showed promise. Best of all, my daughter seemed very interested in what I'd made.

The next head was much better all around. She still doesn't have much of a chin but otherwise I felt like this might actually be something I'd enjoy doing. The next step is to create a body. I'm debating trying to draft my own pattern for that or purchasing one like the ebooks I found at Dancing Rain Dolls. I had been thinking of making her into a fairy but now that she's got hair, I think she might need to be a mermaid.

Tuesday, May 11, 2010

Audrey is here!

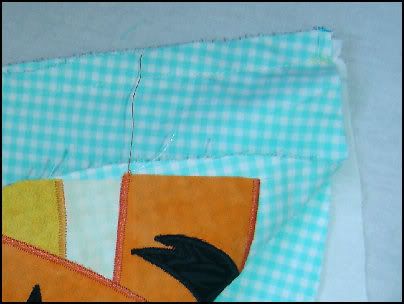
The Audrey Ruffle Skirt pattern is now in the initial release. I currently have it offered via my Facebook fan page. Here is one skirt I made using the pattern.

Update 5/27/10: The pattern is now available in my Etsy shop. There are 2 size groups, 3/6M to 5/6 and 7/8 to 14/16. I've also added a listing for both for 25% off.

Tuesday, May 4, 2010

Emma Swing Top variation - "Sew a long" tutorial

The Emma Swing Top pattern, from Bella Marie Boutique, is such a cute style that is perfect for summer or layered over another top for cooler weather. I know, though, that some moms are concerned about the open back of this top and have been reluctant to purchase the pattern. Below is how I have used that pattern with just a few minor changes to make a top that retains the look of the Emma but has an elasticized back that is all one piece. Another small variation from the original is that I made the top slightly longer and added 2 ruffles at the bottom to make it into a dress.
FRONT

BACK


Cutting the pieces

1) For the front and straps, I cut the Front (main and lining fabric) as directed as well as the Front Contrast , 2 Strap pieces and ruffles for the straps. Note: I don't use the Front Contrast Lining. Also, I'm so used to using 1/2" seam allowance so I add extra to all pieces since the pattern specifies there is a 1/4" seam allowance. The seams will get trimmed later either with scissors or the serger.

2) For the back, I fold the fabric and place the Back pattern piece 3-4" from the fold. I know this changes the orientation of the grainline from what the pattern indicates but it works fine. The extra width of the back allows the top to be pulled over the girl's head but doesn't make it too full in back. Cut Back Constrast so it is the same width as the Back all one piece. Note: I don't use the Back Lining or the Back Contrast Lining.


Assembly

3) Baste stitch 1/4" from lower edge of Front Contrast. Clip seam allowance at the curves just to stitch line. Turn up edge using stitching as guide and press in place.


4) Place Front Contrast along top edge of Top.


5) Baste stitch Front Contrast along top edge of Top (I baste so it's about 3/8" from the edge so it will be hidden by later stitching. Topstitch 1/8" from lower edge of Front Contrast.


6) Position straps as shown in pattern instructions. Pin in place. Note: I like to angle the straps slightly so they lay flat when worn.


7) Stitch Front Lining to Front along top edge. Trim seam allowance clipping at the curves as needed so when it's turned RIGHT SIDE out the curves will lay flat.


8) Turn Front right side out and press along top edge.


9) Turn one long edge of Back Contrast up 1/4" and press. Pin free ends of Straps in place with the WRONG SIDE of the Straps to the WRONG SIDE of the Back. (This will make sense later. :-) Place RIGHT SIDE of Back Contrast along top edge of WRONG SIDE of Back. Stitch along the top edge of Back. Trim the seam.


10) Turn Back Contrast to RIGHT SIDE of the Back. Press in place with folded edge of Back Contrast turned under. Topstitch 1/8" from lower edge of Back Contrast. Decide how many rows of elastic you want to have in the back and stitch the length of Back Contrast to create the casings. Note: I used two lengths of elastic in my sample so I on the Back Contrast to make the casing. The top of the Back Contrast was left to ruffle a little once the elastic was inserted.


11) Cut elastic 1/2 the chest measurement minus 1". Insert it into the casing and pin each end to secure. Note: You might need to adjust the length of the elastic but this gives you a good starting point.


12) Turn the Front inside out so the RIGHT SIDES of the main and lining fabrics are facing each other. Layer the Back between the Front main and lining pieces at the side seams. Basically, you're creating a fabric 'sandwich' with the 2 layers of the Front as the bread and the back as the filling. Stitch side seams and trim or finish as desired. Note: Now is a good time check the fit at the chest and adjust the elastic if needed.


13) Turn Front RIGHT SIDE out. Press side seams.


14) Topstitch 1/8" from top edge of Front Contrast.


15) Add the ruffle (or ruffles) along the unfinshed edge of the top. Finish the seam as desired and topstitch 1/4" from edge.

It's been too long

So much for my good intentions of doing regular posts for this blog. LOL Life got very busy starting in August and it seemed like I had little time for writing up tutorials. I have, though, been busy working on patterns that are/will be available in PDF form. The first, the Zoe Frilled Layer Skirt is available through my Etsy shop as well as on youcanmakethis.com.

The second, the Audrey Ruffle Skirt, will be available soon! I have received great feedback from my test group and just need to get a few things added to the instructions to make then even more user friendly. The skirt will come with 3 variations, a wrap front style, a flat front and an apron front.